Thursday, December 12, 2013

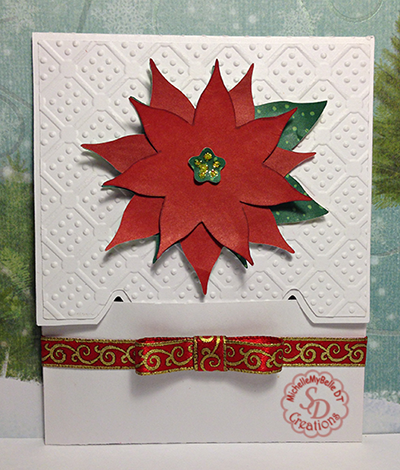
Poinsettia Gift Card Holder

poin copy
Today  for my Gift Card Holder project I'm using  ScrappyDew Creations Free Poinsettia pattern file.
You can download it Here for a limited time!
I also used Brenda's Gift Card tutorial.  With so many cards to make I needed something easy and quick!  This project was perfect.  Once my poinsettia was cut, I took my stylus and distressed the paper a bit. Because the paper has a white core I couldn't distress it too much. I added some yellow Stickles to the center. The front mat was embossed using a Sizzix embossing folder  - Hello Kitty I believe. I don't have the packaging any longer.
poin2 copy
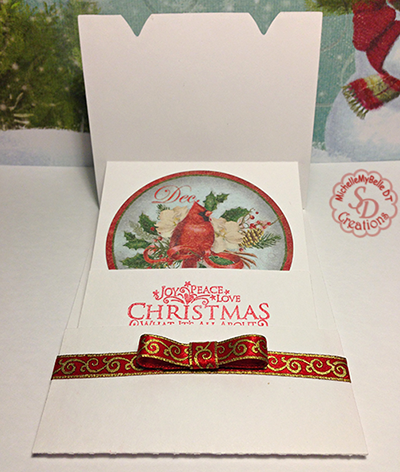
This is the inside of my card. the stamp is from Inkadinkado - Holiday Filigree. I love that set! It was stamped using Martha Stewart Ink. The Cardinal is a Die-Cut from K&CoMPANY - Elizabeth Brownd. The ribbon was purchased from Big Lots over a year ago. The gift card gets tucked in between the cardinal and the stamped sentiment.
poin4 copy
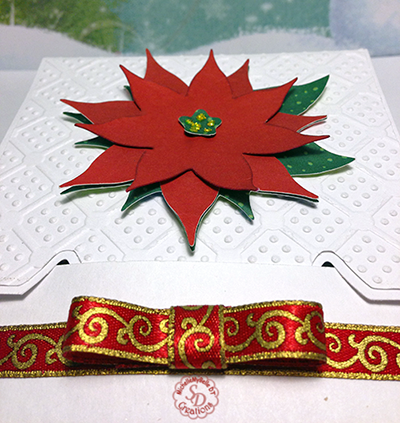
A closer look at the poinsettia. I used Scotch 3D Foam to give it some dimension.
I hope you enjoyed my quick project.

MichelleMyBelle

Sunday, December 8, 2013

Oh the weather outside is.....

 I think I have finally decided on a design from ScrappyDew to use for my Christmas Cards.  (gosh, maybe i won't be sending them in january)  The file can be found at www.scrappydew.com in the vault members area.  Now of course I had to spruce it up a bit.  For the ends of the scarf, I used some embroidery floss, and for the eyes I used some black sticky gems.  Since it is out, I used some wide Christmas wrapping ribbon down the side of the card.  All the papers are scraps and do you see it?  The dreaded glitter paper is the snowman.  (hint:  using my KNK Zing force is 135, speed 9 and 2 passes)  So here is what I have came up with.


I think that it's pretty cute.  I will make 10 cards with envelopes with this pattern.  Then there are a couple more snowmen patterns that I will use (10 in each set) to complete the total of 40 cards (a few extra to start me off for my bazaar next year).  When making batches of cards, I cut all my pieces and create an assembly line and put them together.  I cut all the envelopes in once session.  (it's just the way my mind works)

 From my home to yours, have a blessed Yule!

Bright blessings, Jana


Friday, December 6, 2013

Snow in Love ` Easel Card

Snow in love
2013


Here is a snow globe easel card I created for my design team project with the "Snow in Love" 2013 pattern.  You can find the file here: http://shop.scrappydew.com/shop/item/96321

To create this I used Make The Cut basic shapes for the snow globe the base is a 4" trapezoid that I a wood grain embossing folder and ran thru my sizzix machine,  with a 4' circle for the globe.  I did a print and cut on (printable) transparency.  I even sprayed the cut out with glimmer mist (hard to see in the photo) for a snowy effect.  I layered the inside with winter paper and a "frosty" quote.

I folded the top for the easel at 1 1/2" from the bottom but should have been at the 2" mark since there is space at the top of y globe.  My overall card is 5 x 5 1/2.


Nativity

On a costa rican Christmas decor, you must have a Nativity.
You can find iit in almost every house.

So, when I saw the ScrappyDew´s file "Nativity 2013", I knew it has to be part of my Christmas decoration for this year.

I found in my house a big candle holder and I thought it was perfect to attached the Nativity.


What do you think about this Nativity?? Isn't it a great cutting file?

You can find this cutting file at

Wednesday, December 4, 2013

Make a Wish - Baby Book

Wow today I am again Guest Designer for Scrappy Dew.
I just love this file...
You can find it at the link above.
It is Make A Wish  2013.
I just love bears.. and I saw this file and thought...
Baby book... so that is what it will be..
It's not put together yet as I think I will add a few more pages..
for photos.. but it will be bound with all the ribbons shown in the pics.

All of the above including the pages were cut with my cameo..
I added Stickles - gold, crystal, and waterfall.
I added some button brads and some bling from my stash...
I also added white gel pen to go around each page.


I have to say thank you to Michelle S. and the 
Scrappy Dew family for having me as a Guest Designer.
I will post this mini album on the Facebook page when done.

Laura


Tuesday, December 3, 2013

Baking Spirits Bright


Today I'm sharing a layout I made using the "Gingerbread Cookies" file from ScrappyDew.com. I just love how cute these little guys turned out! This is going to be a perfect layout for all the Christmas cookie baking my little ones and I are going to be doing!


Thanks for Looking! 
Melissa


Saturday, November 30, 2013

Just skating by!

 Today's project is for a very special friend.  We have been friends since we were 12 (holy cow! that's over 40 years!).  She has always liked polar bears.  I have used the Ice Skating Polar Bears file from ScrappyDew's website http://shop.scrappydew.com/shop/item/49654 .  The lyrics are:  Paper is Recollection scraps, the dang gummed glitter paper from H-E double hockey sticks, sparkles from Crystal Stickers and finally the Merry Christmas stamp is one I got somewhere, who knows.  I used my old stand-by easel card pattern. So here is my creation...


Next week I hope to have an outdoor Christmas project to share with you.

Bright blessings for a wonderful week, Jana.