Showing posts with label My Little Angel 2012. Show all posts

Wednesday, May 14, 2014

Angel Frame

Hey Everyone! Ken here with Ken's Kreation's. Well I hope all of the mom's out their had a wonderful Mother's Day. Mother's Day has turned into a tough day since I lost both my Mother and Stepmother at a young age. I was 24 when my Mother passed and then 4 years later I lost my step-mother. This year instead of struggling with the day, I turned to my craft room and found a way to honor them instead. Here is my dedication to all of the people we have lost:
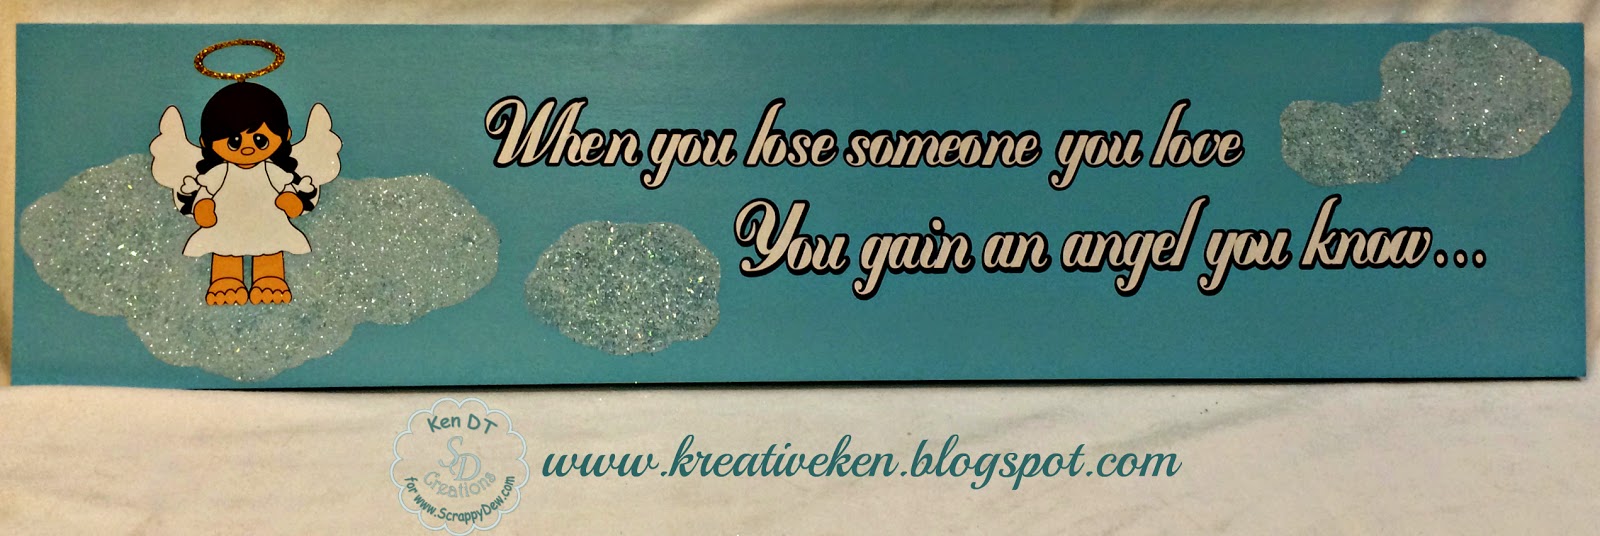
I made this frame using the Scrappy Dew File LITTLE ANGELS. This is a great set that features a variety of angels on clouds. This was a perfect set for the theme of the project. I started with a craft board that I found at home depot. This wood craft board measures two feet long and was 1.28, which is much better than what I would have paid at Hobby Lobby. Then using the LITTLE ANGELS in my Silhouette Studio Software i  build the angel from the base up using the SVG files. Once i had the doll constructed as I like, using my Silhouette Cameo's print and cut feature, I printed the angel at 4.5 inches on the SQUARE 1 PRINTABLE FABRIC. 

I found a curly font that I liked and typed it into my Silhouette Studio Software. When I type I type the font out and then using the corners, I either make my font smaller and larger depending on the project I am using. After i found the size of the font I liked, I used the offset feature at .05 and made the base of the letters. I cut my sentiment on WHITE VINYL and the shadow on DARK BLUE. Here is the link to the "curly fonts" on dafont.com
CURLY FONTS CATEGORY
For the clouds I used one of my favorite Silhouette Materials. I cut out the clouds that come with the LITTLE ANGEL set and cut them on Silhouette's DOUBLE SIDED ADHESIVE MATERIAL. I love this material since both sides are sticky I was able to cut the clouds, peel away the yellow film and stick it down on my board. Then once I had all the clouds down I peeled off the white film and sprinkled  Silhouette WHITE GLITTER,, Martha Stewart TINSEL GLITTER and Martha Stewart CHUNKY GLITTER all over the clouds until covered. I finished the angel off with some Stickles GOLDEN ROD for her halo. 

This was a super fast and easy project and it helped me honor my Mom's on Mothers Day even though they are not here with my in this physical form. 
Supplies and Project Details:
Time: 25 Minutes

Machine:  Silhouette Cameo
Software: Silhouette Studio Software
Board Material: Wood Board
Media: SQUARE 1 PRINTABLE FABRIC
                        DOUBLE SIDED ADHESIVE MATERIAL
Vinyl: WHITE VINYL, DARK BLUE
Glitter: WHITE GLITTER, TINSEL GLITTER , CHUNKY GLITTER
Stickles: GOLDEN ROD
*SALE 70% off $30 ORDER - NO COUPON REQUIRED*

~Ken~

Saturday, January 4, 2014

Blessings Box

Last year I tried something new.  It was a post I saw on Facebook.  It was a mason jar that had been spruced up.  The jar was then labeled Blessings 2013.  So I had a very cute jar the girls had given me for Christmas, I labeled it and put little pieces of paper in it.  On each slip of paper I wrote the date and the blessing.  Then on New Years Eve I opened each blessing.  A few tears were cried but it is something I hope to continue each year from now on. 


BUT~~~~~you know that I can't do anything without creating a mess first.  Glitter faerie fights with the Bling Brats is fairly common in my studio.  I decided that I would re-purpose a wooden cigar box into a beautiful blessing box that I could use over and over.  So let's get this project started!!!


Here is what my cigar box looks like.  It's dinged up and battered.  Just wait little box, you are going to become treasured.


So the first step is to cover the inside of the box.  I carefully measured the inside bottom and then side height.  Added it together and the inside came to 8 3/4 by 9 1/4 inches.  I am learning in my old age to cut a pattern out first (to many mistakes to waste my pretty paper or material)  I cut a square with these dimensions and then cut each corner out using the height of the side. I scored a square linking the cut out squares and folded up the sides.

A pic is a better explanation.


 Well I thought I was on the right track.  THIS IS WHY I ALWAYS USE A SCRAP.  Trial and error is usually how a project starts for me.  So I measured again, took the same steps and this is how it looks.  

Yes dear friends, I hear you yelling.  YOU HAVE TO ADD THE SIDE TO EACH SIDE OF THE BOX.  Not just two sides....So it took Geometry in College to teach me how to play pool (all about the angles baby)  I'm a little slow on the uptake.  ZENITH ZING to the rescue.  I made a square using the bottom dimensions, added the side height to each side and cut.

 I now have the bottom pattern and can decide what to use.  Pretty paper or maybe some felt with tinsel. Next up is the inside of the lid.  It's scratched and dinged.  So I got the dimensions and cut another pattern using freezer paper that I had laying around (use it for appliques in quilting).  So now I have patterns for the inside top and bottom.
Next is to give the entire box a new pretty surface.  I picked up some black enamel paint while at the Habitat for Humanity ReStore, just a very little bottle and for 25 cents I was happy.  I had forgotten how much I DISLIKE painting with oil based enamel.  Yes it is beautiful when done, nice shine and gloss.  But the clean-up took longer than the actual painting.  So the box is all painted and I let it dry over night.


DAY TWO


Time to get the inside done.  I decided on the black felt with multi-colored tinsel.  I cut the felt using my pattern, sprayed the back with 3M adhesive and stuck it down.  I used my paper folder to make sure the felt was pushed into the corners.  Well I didn't take into consideration the thickness of the felt, it stuck over the edge of the box.  So I got out the scissors and trimmed it.  Well if you look in the above pics, the lip around the inside is a reddish tan.  It looked horrible.  So got the enamel out again and painted it.  It looks much better now. 


DAY THREE


The paint has had plenty of time to cure.  It had felt tacky.  Smooth as glass, so that means is time to transform what was a very sad little cigar box.  Let's start with the inside cover.  I used ColorBok  Pastels paper pack for the background.  Then added some ribbon on the edges.  Next I created the little angel from the ScrappyDew Little Angels 2012 filehttp://shop.scrappydew.com/shop/item/73964.  The clouds are from the same file.  I did use some pink pastel chalk on the edges of the large cloud.  The font is Missed Your Exit and I did a print and cut using MTC to complete the clouds.  Silver stars and tiny flowers are from my big box of sparkles.  I think it looks really cute.


Now for the outside.  I have a punch from EK Success that is beautiful.  I tried and tried to get it to punch through some very thick glitter paper.  Here is the solution.  I used my foot.  I have hardly any strength in my hands anymore.  So I gently stepped on the punch and it worked beautifully.  I trimmed each strip and adhered one to each side (carefully avoiding the hinges and latch).   


Almost done!  I love faeries and wanted a big one for the top of the box.  I used the Royalty Palz #3 princess http://shop.scrappydew.com/shop/item/68599.  The eyes are a pattern that I found over on Brigit Manns's website.  Can't share but I will show you the location http://www.brigitsscraps.com/.  Thanks Brigit! Now I needed some pretty big wings.  Looked in my Scrappy Dew files and found the wings in the Butterflies 2013 set http://shop.scrappydew.com/shop/item/88712.  Using MTC and my Zing, I enlarged the wings and cut one out of Vellum and the other out of DCWV Glitter Paper.  (Just a hint, I saved the glitter paper and used it like a stencil to place the parts on the vellum like a puzzle)  So now to put it all together.  The background paper is DCWV Pretty Posies, more glitter paper around the edges and the font used is Romance Fatal Serif Std.  The final item for my treasured blessings box is pretty paper to write my blessings on.  


So my dear friends, Let me show you my blessings box!!!


It has been a long 3 days.  I really am pleased as punch with the way a dinged up cigar box has become a box to be filled with blessings!  Thank you from the bottom of my heart for visiting today!   If you happen to make a blessing box I would love to see it.  Happy New Year and bright blessings for 2014.


Bright Blessings, Jana


Friday, December 20, 2013

Joy to the World!

For my last 2013 Christmas project, I will remind that Christmas is all about good salvation news:

"For unto us a child is born, unto us a son is given: and the government shall be upon his shoulder: and his name shall be called Wonderful, Counsellor, The mighty God, The everlasting Father, 
The PRINCE OF PEACE-"


To make this project I used the ScrappyDew file " My Little Angel" and you can find it HERE

MERRY CHRISTMAS!!!!
God bless your families.

Monica


Friday, November 8, 2013

Little Angel Gift Box


Keeping up with our Christmas gifts, for this week we have a little box, just to add some candies or a small baking goodie.


This lovely angel is from the ScrappyDew´s file "Little Angels", I used traditional Christmas colors to turn the Easter angel to a Christmas angel.


And, of course, I used a lot of shine as I like for the Holidays Season.

You can find this lovely cutting file at